Flutter is a Google’s UI toolkit by using which you can develop beautiful, natively compiled applications. In the recent days Flutter has gained huge Momentum. Linux and Microsoft Corporation officially announced that ,they are working to bring flutter apps on their Desktop. Giant companies like BMW, eBay, EMAAR have benefited by Flutter. Even apps like Google Assistant and Google Ads use Flutter. By single code base both Android and iOS apps can be developed, by it’s unique features Flutter has proved it’s potential.
Here, I am going to explain you, how to set up Flutter Environment on your System and develop android apps. Let’s begin.
The Basic Requirements to develop Flutter Apps are Flutter Framework, Android studio and an IDE.
Download Flutter here, and follow the steps.
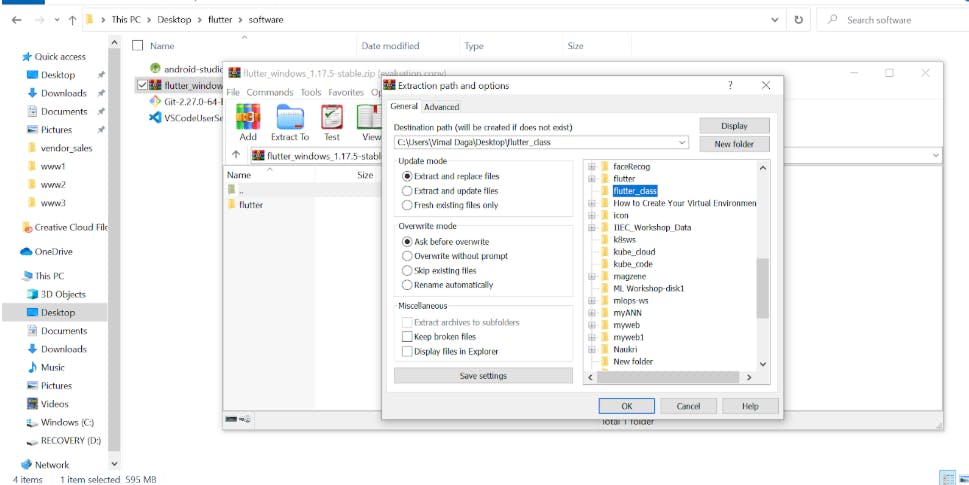
- Extract the Flutter application which you just downloaded.
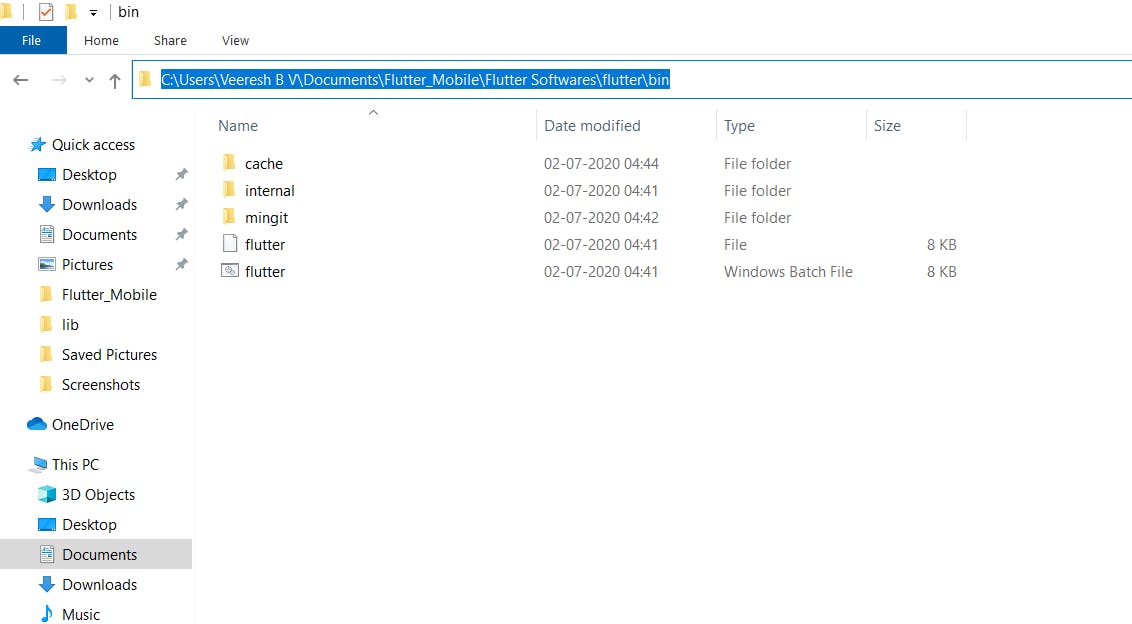
Open the Flutter Folder and navigate to file named bin.
Copy the path of bin file and create Environmental Variable, and save path. By doing this you have informed the location of Flutter to your System.
Now you have successfully installed Flutter , you can verify this by running the command flutter in the Command prompt.
Download Android Studio here,and follow the steps.
To develop Android App using Flutter, you need Software Development Kit(SDK) and Android Virtual Device(AVD) of Android OS .How to get it ? Let’s see here.
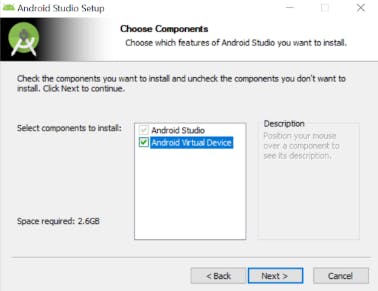
- Open the Android Studio ,in the Choose Components page, you must check the Android Virtual Device box and then click Finish.
- In the home page of Android Studio, click on Configure and open SDK Manager.

2.Navigate to Android Tools and install the following six SDK tools,as shown in the image below. If you are using AMD processor then instead of Intel x86 Emulator Accelerator(HAXM installer), install Android Emulator Hypervisor Driver for AMD processors.
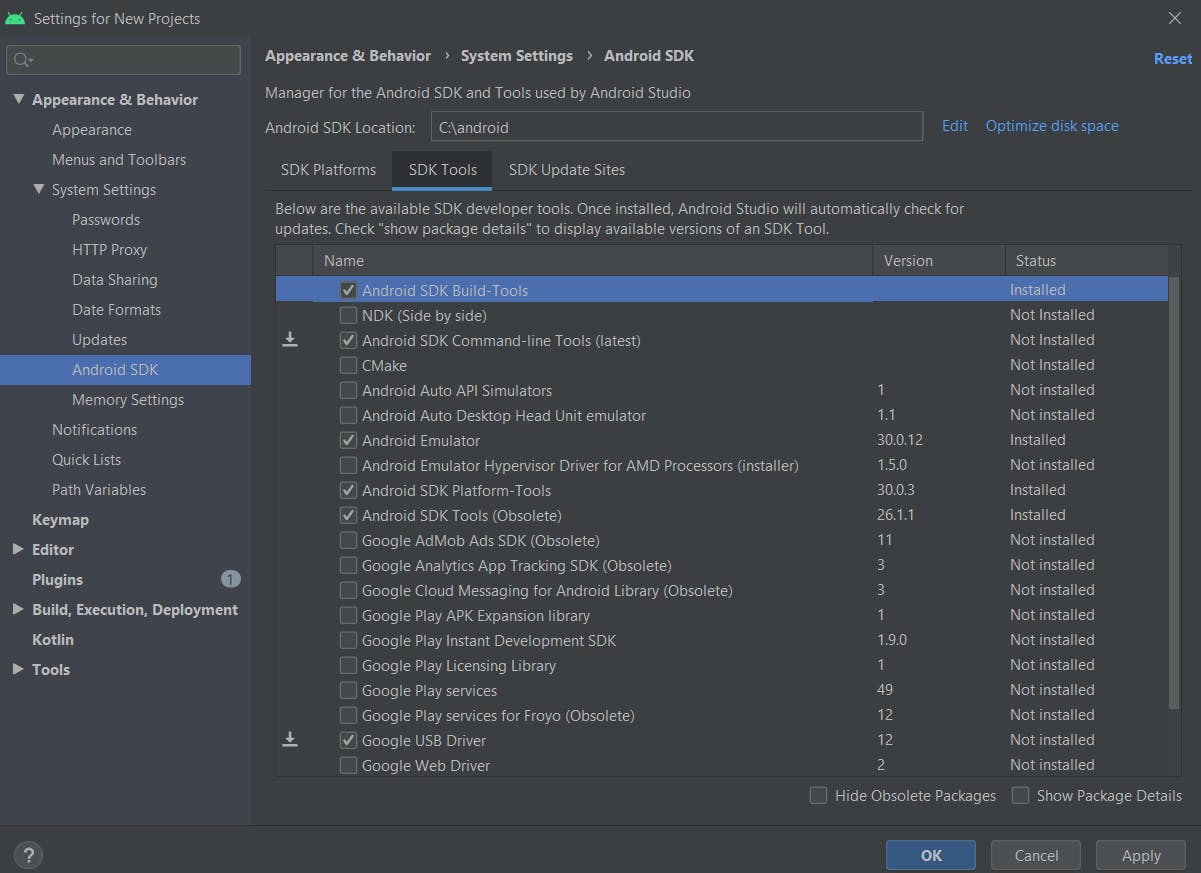
Make sure that there is no space in the Android SDK location . Eg :c:\user\tony stark\androidSDK is not allowed ,c:\user\tonystark\androidSDK is allowed.
4.Navigate to Plugins under configure and install Dart and Flutter Plugins
- After installing all the SDK tools ,copy the SDK location path and set new path variable .
6.Now go to AVD Manager,by clicking on Configure in the home page of android studio, and create your virtual device and name it.
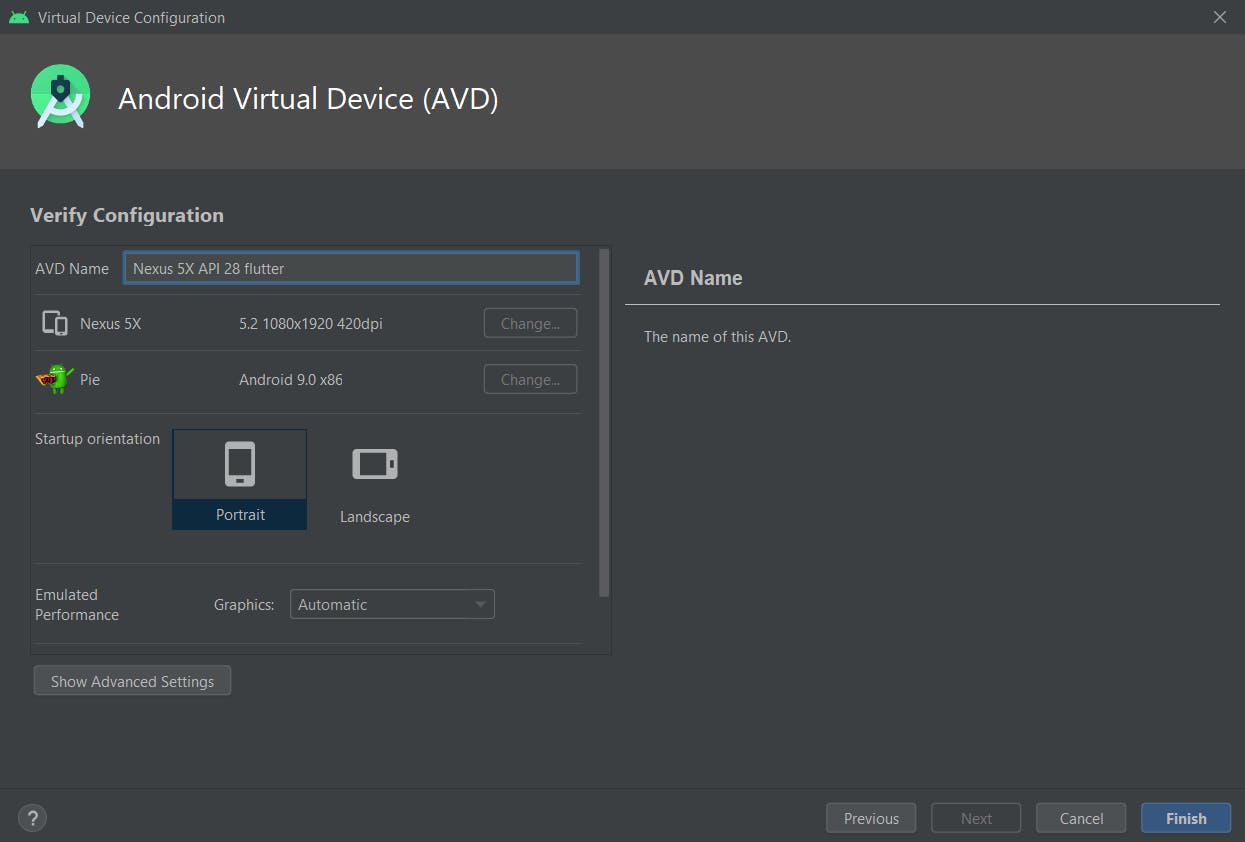
Virtualization must be enabled on your system . In some older system virtualization is not enabled by default , you have to do it manually. Now you have SDK and AVD on your system, to verify this ,open command prompt and run the command flutter doctor.
The last thing you need is an IDE ,you can use any IDE , I have used VSCode here.
Download VSCode [here](code.visualstudio.com/download) .
Install VSCode by accepting all the license agreement.
Navigate to Extensions and install support for both Dart and Flutter.
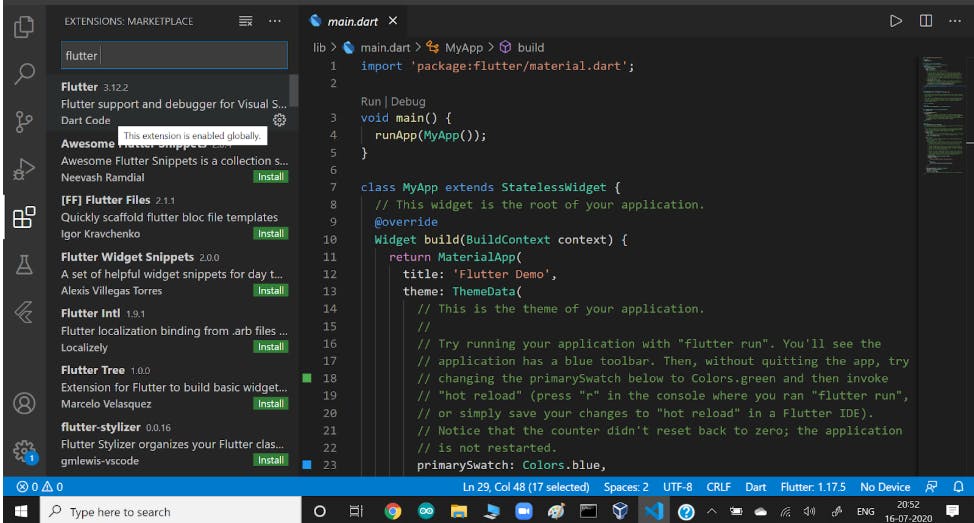
Wow, Now you have everything that you need to develop Flutter Apps on your system. To test your environment, flutter has offers you builtin app which can be created easily ,follow the below steps.
In the command prompt run flutter doctor command, and launch your AVD by using command flutter emulators --launch , and Move to the directory where you need to create your app.
Run the command flutter create ,now your app will be created in the folder that you have specified.
Run and Launch the app automatically by using the command flutter run.
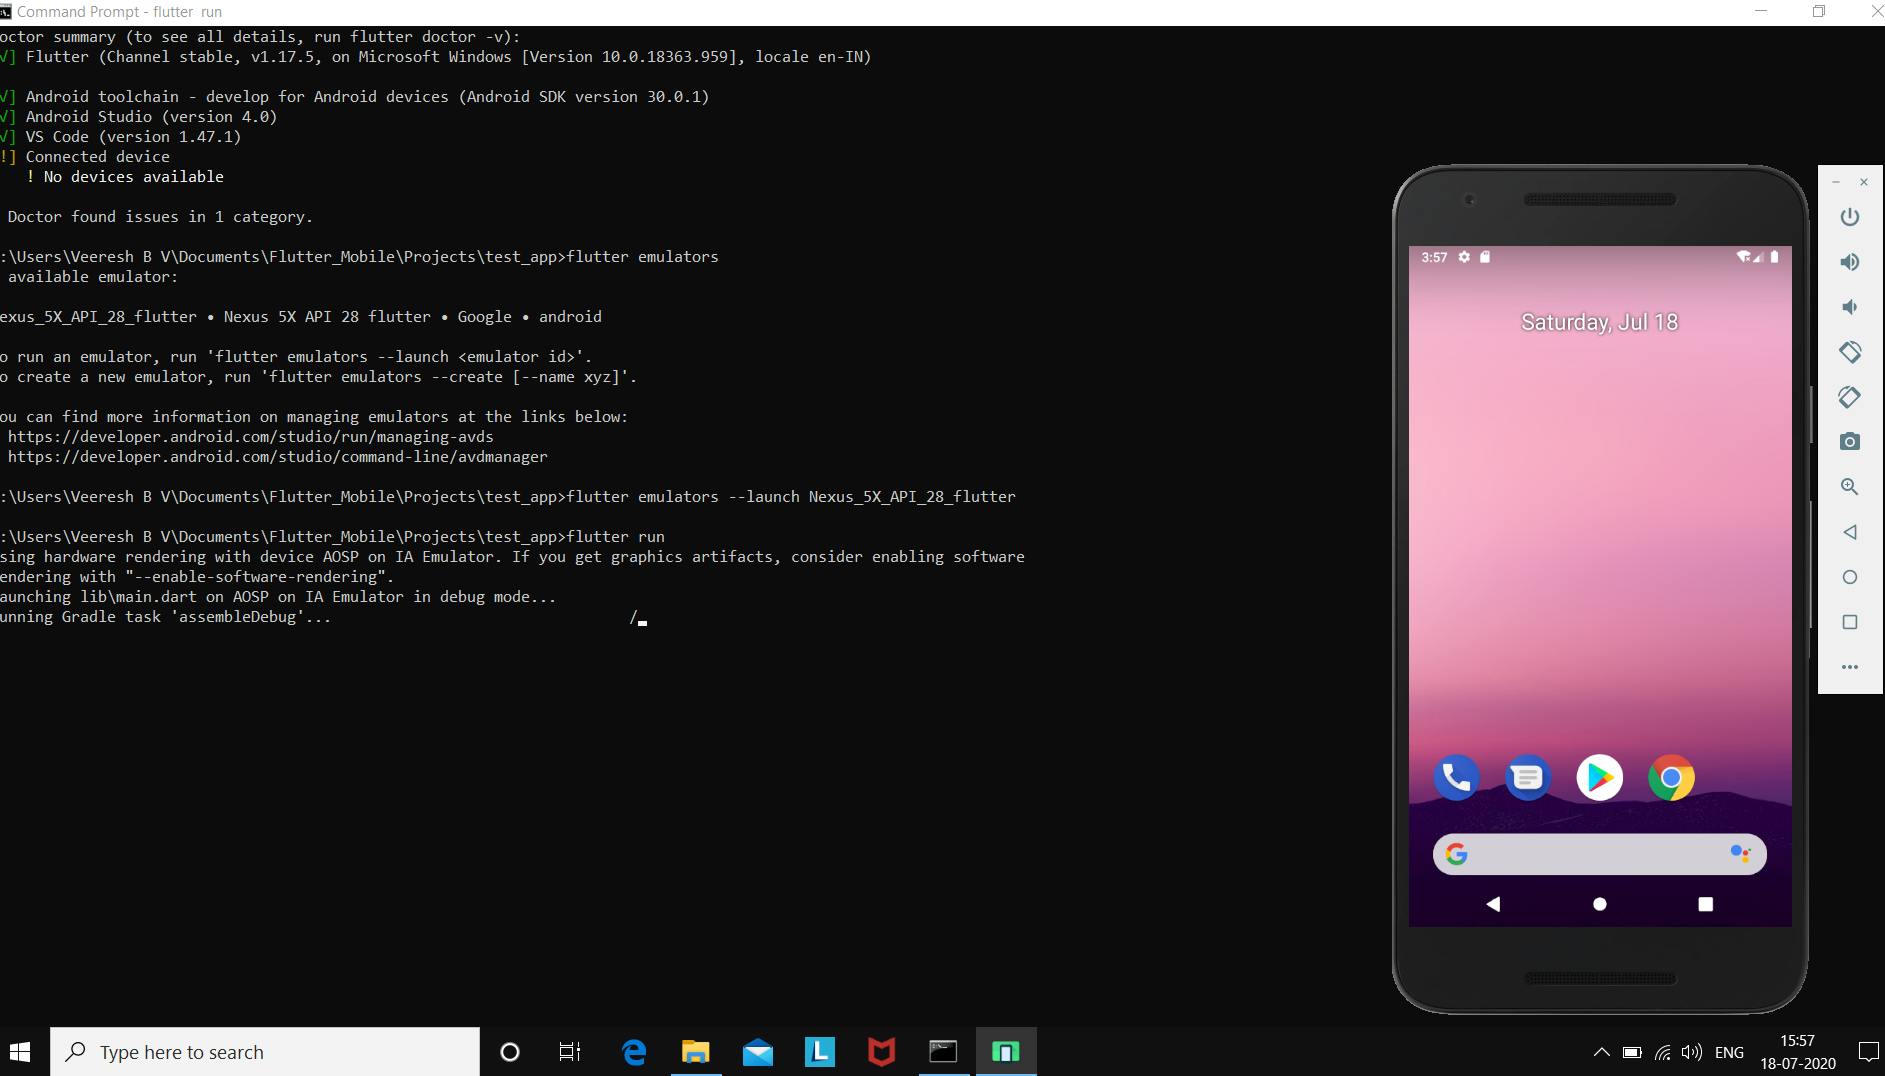
Note : Depending on the speed of your network ,this process would take 2–5 Minutes.
Now you must see the Home Page of your app as shown below.
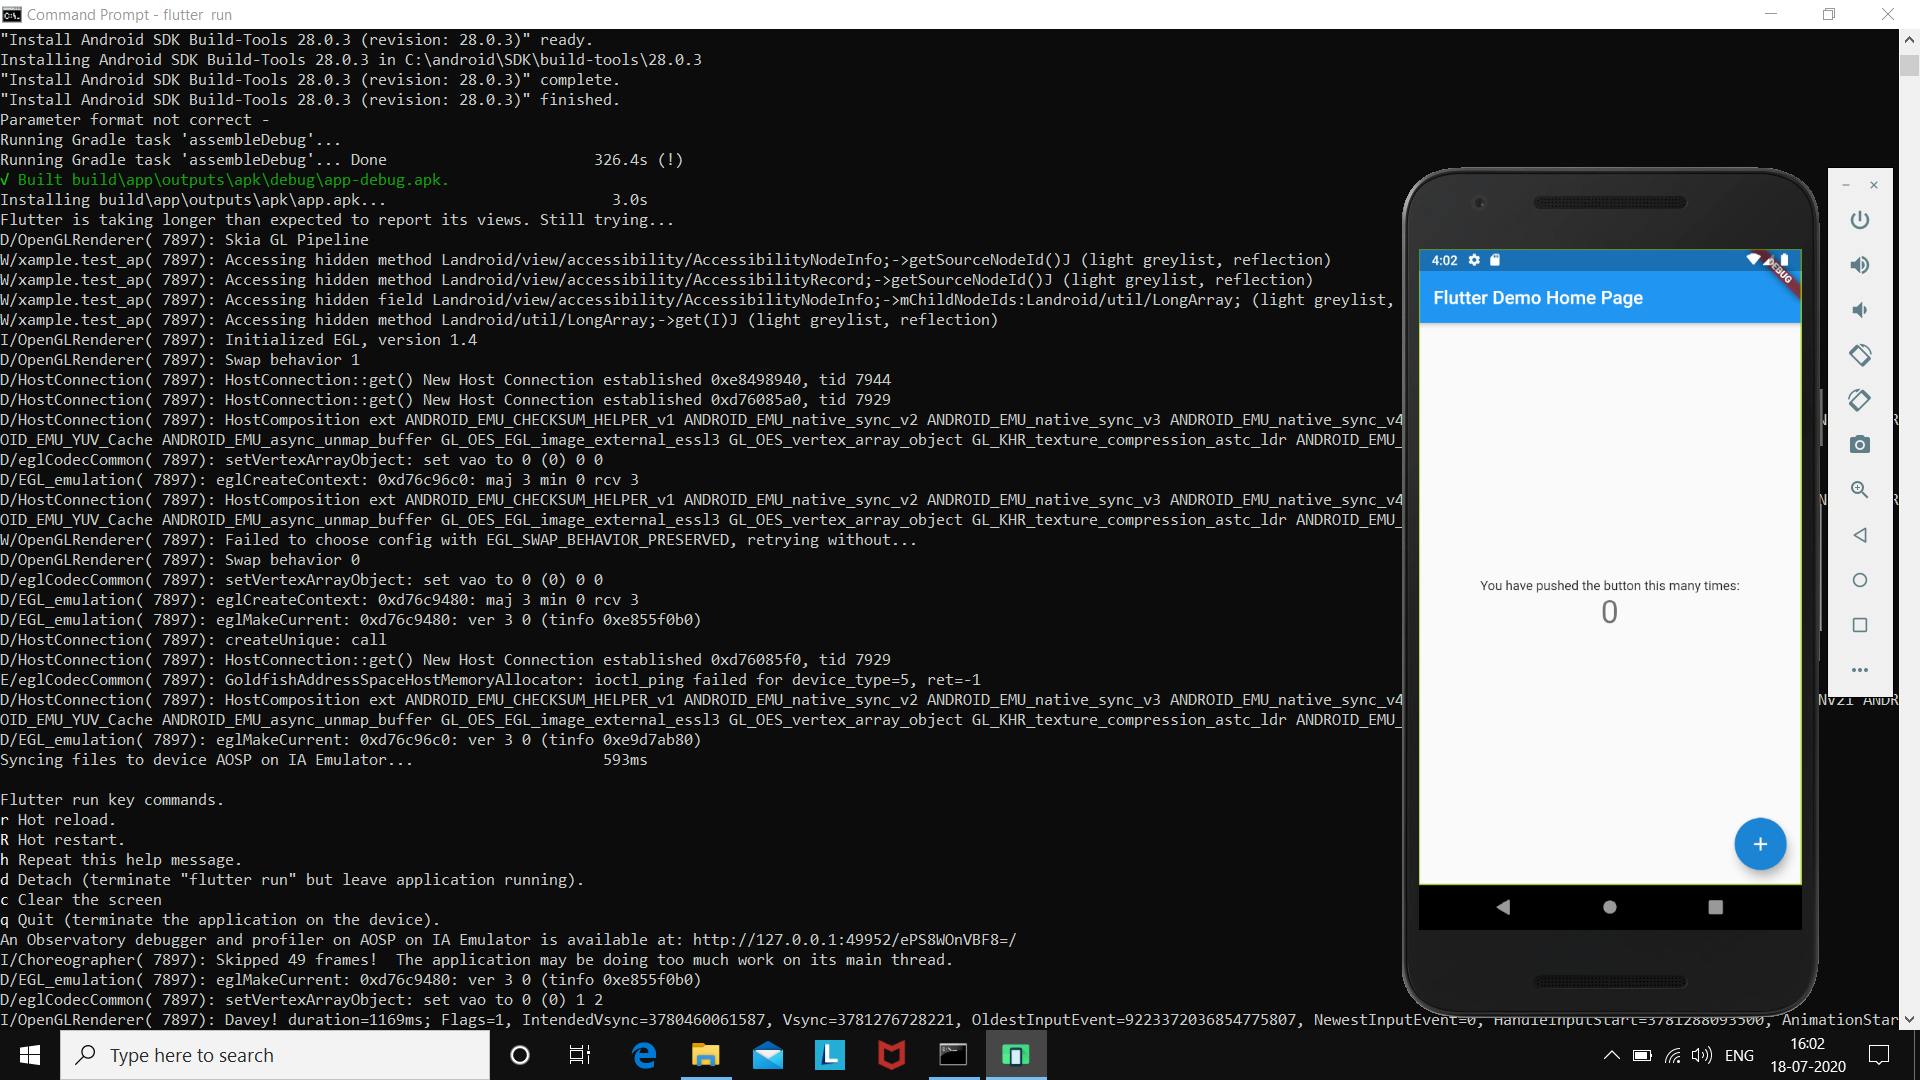
By now you are all set to develop your own apps using Flutter.
Feel free to ask your queries in the comment section, connect with me on LinkedIn,Instagram.
Happy Learning!
Thank You! Signing off!
Veeresh B V
Subscribe to our newsletter
Read articles from Veeresh B V directly inside your inbox. Subscribe to the newsletter, and don't miss out.
